Supercharging a V8 - VerneAndru.com
Supercharging a V8


During the 1990s and into the 2000s the folks at St. Louis Music offered a number of iterations of their Crate V-series amplifiers. Starting with the Vintage Club moniker, the series are tube-based guitar amps in sizes varying from 5 up to 100 watts. Designed by Obeid Khan, who went on to design Reason and Magnatone amps, they have a reputation for being well-designed, good-sounding, affordable, and oh-so-cute. This thread is the story behind the transformation of an Obeid designed Crate Palomino V8, a 5-watter sporting an effects loop and a 10" speaker - the ideal combo for the perfect recording/practice amp. The Palomino was a Musician's Friend/Guitar Center specific version differing in its blond tolex and larger, 10" speaker; the circuit is the same as the other EL84-based Class A amps in the V series.


Supercharged V8 in action!


While the V8 comes with all the right fundamentals, it needs a bit of help in the tone department. What follows is a synopsis of a Harmony Central thread that spanned 23 pages, running from January 2007 until 3 days short of January 2012. Verne posted regular updates and answered questions from other gear-heads on how to get the best tone out of a Palomino V8 guitar amp.


With Harmony Central going through multiple "issues" that drained their once large member base, and the mangling of threads, including this one, we decided to make the meaningful bits available here in a more condensed, and hopefully useful, format. You can choose to read through from start to finish, or use these links to jump to areas of most interest:


The original thread evolved organically with the only real aim being to find a way to make the amp sound as good as possible. As such, some of what follows wanders a bit, but we've tried to edit it down to the basics [check the original Harmony Central thread if you want to read the play-by-play] and have moved a few things about so they are more or less in relevant blocks. For those looking for the bare necessities, here are clips and final schematic:

For complete details, or those brave souls wanting the blow-by-blow, let's start supercharging!


Introduction - What It's About

I was recently in the market for a low-watt tube amp for a project I'm working on that requires tube crunch. My shopping list for a low-watt recording/practice amp looks something like:
    - 5 watt [switchable to 15 would be nice but not necessary]
    - FX loop with send and return level controls
    - gain, bass, mid, treble, attenuated master volume, 4-16 ohm
    - DI – balanced/unbalanced switchable
    - speaker out – 4-16 ohm selectable
    - real spring reverb
    - well voiced 10" speaker
    - $299
After looking at what is available in the market it became clear the above amp exists only in my mind. So, I decided to find the next best thing that would provide a solid build platform. The Crate/Ampeg Palomino V8 came the closest:
    - 5 watt
    - FX loop with send level control
    - gain and tone
    - 10" Celestion speaker
    - 12AX7 pre-amp / EL84 power-amp
    - $279
The V8 is made in America – St. Louis Mo. to be exact. The “Crate” name is a bit misleading. At some point, St. Louis Music, Crate and Ampeg all became a singular entity. I’m not sure of the details – some say SLM was Crate and bought Ampeg, others say SLM was Ampeg and bought Crate – but it’s fair to assume the “Crate” name is for marketing purposes only. But since the Crate brand has such a bad reputation, one wonders about the logic here. Back in the 60’s Ampeg was making a V5 series of 5-watt tube amps, and while I’ve not A/B’s the schematics, I suspect the V8 is a modern take on that design. The point I’m trying to make is the V8 is really an Ampeg in Crates clothing. So, for my own edification, it’s the Ampeg V8.

The sales literature states “Class A circuit essentially runs the Groove Tubes(TM) EL84's at full output at all times.” It run the output tube [EL84] at a constant output level all the time.

When I received the amp from
Musicians Friend [the Palomino’s are exclusive to Guitar Center/Musicians Friend] I took it over to a local boutique amp builder to check over and he was hard pressed to find anything wrong with it aside from a bit of rattle and hiss when the gain gets cranked.


Rattle Fix

Common problem: I’ve heard people complaining about these amps having a rattle at higher volumes. Mine had a minor rattle coming from the where the backboard meets the chassis. I stuck some door/window foam insulation around the metal chassis where the backboard meets and the rattle went away.

While fixing the rattle, I was quite surprised at how well the little thing is made. Really clean PCB and wiring. Looks like they used high quality parts all around - at least not the cheapest parts you can buy [except the op-amp which I’ll get to]. Here’s what’s inside:
    - Input op-amp -> TL072CN [KDC 539] 8-pin ceramic package
    - Pre-amp tube -> GT12AX7R [ECC83/7025]
    - Power tube -> GTEL84R #6 [6BQR] [in a solid cage to hold it in place]
    - Output Transformer -> SLME 94-252-01 [071-10200-000-0]
    - Power Transformer -> SLME 94-252-01 [070-10002-100-0]
The GT stands for Grove Tubes, and SLME stands for St. Louis Music Enterprises. It's got a few "jumpers" that [if this is the same as the Crate V508] are for switching different country power supplies – ie 120v 220, etc. It has a 15 watt, 4 ohm 10" Celestion Palomino Series speaker that has a St. Louis Music copyright notice on it.

Upon using the amp, it became apparent they made some design compromises along the way. The FX loop is labeled "line out," which says quite a bit about how they figure you'll use the amp. The gain, tone and volume controls are all wired into the 12ax7 pre-amp section and I guess they expect you'll dial in your "tone" there and use the line out to go to a bigger amp or into a recording desk. Preamp distortion tends to be a bit on the lean side IMO. The volume control is functionally an FX Send level control that doesn't go beyond a weak instrument level in strength. Since the op-amp and the 12ax7 really reduce the amount of headroom you have, you're limited to how hard you can drive the rest of the amp. The EL84 power tube is running wide open all the time but the muted level coming from the pre amp doesn't drive it anywhere close to distortion, which is where you get the ballsy lows from.


Op-Amp Upgrade

After close inspection the only “issues” were high gain “hiss” and lack of clean headroom. The hiss becomes a problem when you get past 10 o'clock on the gain. The suspected culprit was the op-amp SLM used. While using an op-amp in the pre-amp stage isn’t “pure” it does makes quite a bit of sense. Tubes are noisy and if you use tubes exclusively, that noise just gets passed on and worsens through the signal chain.

The problem with the opamp implementation as found on the V8 – particularly the hiss and extremely low amount of clean headroom – isn’t the USE of an op-amp, but the CHOICE of op-amp. The TL072 is a cheap [20 cents in quantity] component that probably introduces as much noise as using a tube, so it defeats the purpose. Because of its low headroom, it actually introduces a bunch of noise that keeps you from really cranking the gain to its sweet spot.

The “fix” is to replace it with a TLE2072. This is one of Texas Instruments Excalibur series and is renown for being the best of the best. You can get this chip from
Mouser for around $2.50. The only complicating factor is that SLM soldered the TL072CN to the circuit board. So changing chips involves:
    A] Removing the backing board – 4 screws
    B] Clipping the legs off the TL072CN so it can be removed
    C] Soldering either a socket or a TLE2072 to the leg stubs you [hopefully] left plenty of from the TL072CN
    D] I did the socket, just in case, so obviously seating the TLE2072 properly in the socket is important
    E] Turning on the amp and praying you did everything right.
    F] Doing B to E above will void your warranty.
---------
Edit: When I did this I used a cheap chip socket. Under use, the chip has a tendency to wiggle around and not make proper contact, audible by an annoying hum. Use of a high-quality socket or, even better, soldering the chip to the board/old chip legs are better options.
---------

DO NOT DO THIS IF YOU DO NOT HAVE ANY SOLDERING SKILLS. While it isn't a dense board, and there are no transistors to short out, it is tricky getting in there with a soldering iron and if you apply too much heat you can screw up something.

The other way to do this is to remove the circuit board, use a solder sucker to remove the existing op-amp, and then solder either a socket or the new op-amp in place. This is much more time consuming and dangerous as you have to pretty much take the whole amp apart and get into draining the capacitors so you don't get the shock of your life. The first method isn't as elegant, but it's fast, easy and works.

With a guitar jacked directly into the amp - no effects or anything else - and the gain and volume wide open, I get about the same amount of hiss I had around 10 o'clock before. The amp gets really sweet with the gain around noon now, and the hiss doesn't become noticeable until around 2 or 3 o'clock. The chip and socket will set you back under a fiver and it'll be the best 5 bucks you ever spent.


Basic Electronic Mods

1 - Somewhere in this thread I mention that I used a plastic enclosure for the Backpack but should have used a metal one. As it turns out, plastic is the better choice. Because of the different circuits - some input, some output, some FX - using a metal enclosure would have forced everything to the same ground. I lined the plastic box with copper foil and simply cut out what was needed to isolate the various circuits and their accompanying grounds.

2 - Add more bottom-end thump and remove shrillness - Amp techs love to screw with some specific capacitor and resistor values to tweak an amps voice. On the V8, changing capacitor levels involves taking the whole amp apart, but you can effect most of these changes by adding a couple of resistors to the component sided of the PCB. First, download the schematic:
Second, get 2 x 1K 1/2 watt resistors. Cost - under 50 cents.

Now, locate and remove C9. This involves clipping one of it's legs to debilitate it, both to remove it. This is similar to the Fender top-boost circuit that nobody uses. It just adds the shrillness to the amp. Cost - nothing.

Now for the resistor changes. We can change the values of R10 and R15 to the same as replacing them with 560 to 830 ohmer's by putting a 1K 1/2 watt resistor in piggy-back fashion across each. This lets more current/frequency through providing a sweater mid range.

The corresponding caps at C7 and C13 can be changed as well [board flip required] but my amp tech claims the bigger changes come with the resistors. These changes cost pennies and don't take long once you're inside the amp. If you do decide to flip the board, changing C8 to .068 uF 400 volt MTLPOLY would be worth your while.

The only other "fix" is some additional clean headroom. This can be had by swapping the 12AX7 for a 12AT7. That gives you another 20 to 30 percent clean headroom and about that much more volume.

There’s a page floating around about an unidentified person who modded a Crate VC508 by desoldering the gain and volume pots and wiring them on the other [return] side of the FX loop. His reasoning for this is sound, but there is a much simpler way to achieve the same end.

The “volume” control is really a preamp level [FX send] control they've limited to a weak instrument level signal, not a line level. Like most valve amps, this one really comes into it’s own when you're juicing both the pre-amp and output valves. The way it’s built, the power tube never gets driven into distortion if you’re using it like most players do:
    Guitar->Optional Effects->Input
The volume control acts like a limiter to the signal going into the EL84 power valve. The rewiring mod gets around this by moving the level control to the FX return side [FX return level] so you can increase the signal going to the EL84 driving the power tube into distortion. As mentioned above, preamp distortion tends to be lean. What you want for real ballsy distortion is to get it from the EL84 power tube, or a combo of the two. The easiest way to do this [and not muck with the amp] is:
    Guitar ->Input->FX Send->Clean Booster->FX Return
This lets you dial in the gain and volume on the amp for a nice clean tone and when you want tube distortion just kick on your clean booster. It turns the V8 into a great little 2-channel all valve monster.


Backpack - Multi-I/O Box

Having cleaned up the basic amp, I then moved on to adding some of the other features I was looking for. Since most of it is signal routing, I decided the best way to go about this was to build a multi-I/O box [backpack] that attaches to the backing board with velcro so it can be quickly installed and removed without tools. I cut a new backing board out of a spare chunk of wood and put the original away for safekeeping.

Even at 5 watts, the V8 can get a tad on the loud side. One of the really neat things you can do with a low-watt amp is to add a master volume control AFTER the power amp. The backpack contains an
L-Pad - a big volume control you normally find in-wall for remote controlling the volume of a stereo system. They cost under $5 at an electronics store and are designed to keep a constant load on the amp while allowing you to control the volume going to the speaker. And it doesn't suck tone like the expensive attenuators do - it's totally transparent. With it I can keep both the pre and power sections maxed for the tube crunch I want, yet I can turn the volume down to a whisper. I also did a DI circuit that's all of 2 resistors so I can plug the V8 into a higher power amp for gigging or into my desk for recording.

I started out with this as a general layout and took things from there.


Instrument goes in on the left, splits then jumpers into the amp. There's a toggle so I can switch the instrument either to the amp or straight to the FX send. The big knob in the center is the L-pad that works as a master volume. The jumper on the right is a TRS that takes the FX Send and Return in and out of the amp. The toggle switches the Sends to be either from the amp or the instrument so I can bypass the preamp altogether if I want to.


On the side, from bottom to top, are 2 FX sends, 1 FX return and a DI out [schematic attached below]. I put the DI trim pot in one of the holes near the top and the other is empty.


This side has, bottom to top, amp speaker IN and OUT. This feeds the L-pad and DI. EXT speaker out and a kill switch for the amp speaker only, EXT jack remains live.


Not as elegant as having everything as part of the amp, but it works. The mods above, including a breakout box like the one I've done, will cost you under $50 - bit more if you need a tech to do it for you. All it’s missing from my list are a reverb and balanced DI. I have a rack reverb, so that’s not an issue and will be add either a custom DI circuit or something like the Behringer ULTRA-DI DI400P.

I've added the following notations to the first few posts, but thought I'd copy them here for those following the thread.
  • When I did the Opamp swap, I used a cheap chip socket. Under use, the chip has a tendency to wiggle around and not make proper contact, audible by an annoying hum. Use of a high-quality socket or, even better, soldering the chip to the board/old chip legs are better options.

  • Somewhere in this thread I mention that I used a plastic enclosure for the Backpack but should have used a metal one. As it turns out, plastic is the better choice. Because of the different circuits - some input, some output, some FX - using a metal enclosure would have forced everything to the same ground. I lined the plastic box with copper foil and simply cut out what was needed to isolate the various circuits and their accompanying grounds.

  • Add more bottom-end thump and remove shrillness - Amp techs love to screw with some specific capacitor and resistor values to tweak an amps voice. On the V8, changing capacitor values involves taking the whole amp apart, but you can effect most of these changes by adding a couple of resistors to the component sided of the PCB.

    1. Download the schematic: modified_vc508_schematic.pdf

    2. Get 2 x 1K 1/2 watt resistors. Cost - under 50 cents.

    3. Now, locate and remove C9. This involves clipping one of it's legs to debilitate it, both to remove it. This is similar to the Fender top-boost circuit that nobody uses. It just adds the shrillness to the amp. Cost - nothing.

    4. Now for the resistor changes. We can change the values of R10 and R15 to the same as replacing them with 560 to 830 ohmer's by putting a 1K 1/2 watt resistor in piggy-back fashion across each. This lets more current/frequency through providing a sweater mid range.

    The corresponding caps at C7 and C13 can be changed as well [board flip required] but my amp tech claims the bigger changes come with the resistors. These changes cost pennies and don't take long once you're inside the amp. If you do decide to flip the board, changing C8 to .068 uF 400 volt MTLPOLY would also be worth your while.


Quick Tweak

I've been contemplating tone stacks and it appears the V8 is very similar to the Marshall 18 watt [http://amps.zugster.net/articles/tone-stacks#18Watt]. The resistor values on the V8 are higher - I'm assuming that's to cut the signal strength to allow for the effects loop, which the Marshall doesn't have. The V8 also has a .0022 uF 100v capacitor [C12] the Marshall doesn't have.

I decided to pop the leg on one side of the cap to see what effect it has on the tone. Surprise, surprise - that little bugger is the cause of some major nastiness. The tone control on the V8 works so in the middle you get full treble, turn left and you add bass and turn right and you alter the mid-range [in a good way] but muddy up the signal at the same time.

It turns out the "honky" mid-range that adds a "boxiness" to the tone is coming from C12! By simply removing that cap you re-voice the amp in a very good way. The tone pot now does the same thing turning right or left, except it isn't affecting the mid-range because the cause of the midrange problem, C12, is no longer in the circuit.

If you do nothing else to your V8, remove C12 and C9. These can be easily snipped off without taking the amp apart. Thank me later.

I picked up a new Crate V33H’s that’s going to need some modding, so I felt it was time to finish off my V8 before I dug into the new one. While the V8 sounded much better than stock, I still found it had a midrange “honk” that I didn’t like and was using an external unit to EQ it out. My goal was to get the amp to the point of sounding “great” with just a guitar plugged into it – no effects. The previous mods certainly helped but it still wasn’t “there” yet. My todo list included:
    - Soldering the opamp directly to the PCB [getting rid of the chip socket]
    - Swapping capacitors
    - Changing speakers
Changing capacitors and soldering the opamp involve removing the PCB, which requires draining capacitors. According to my meter the board holds a charge of 60 to 70 volts that may not kill, but will certainly ruin your day. With capacitors drained, a few minutes with a solder-sucker was all it took to remove the old parts. I changed C7 and C13 to 330uF and C8 to .068uF after attending to the opamp.

The capacitor changes, while subtle, were enough to remove the midrange issue when running the amp through an external speaker. But the stock Celestion still sounded “honky” and “boxy” so I went ahead and placed an order with Weber for a replacement speaker, which we'll discuss next.


The EUREKA moment!

Remove C2!

It's the opamp shrillness culprit! This should work on the new V5 as well.

All this talk got me looking over the V8 schematic this AM and C2 just jumped out at me as being wrong.

When a circuit is done properly, extremes on the controls should do just that - give you too much bass/treble/whatever. While my V8 sounded great, I've needed to have the bass control cranked all the way up to get a nice ballsy tone leading me to believe there was something that still eluded me.

Pop C2 out of the circuit and everything works as it should. Too much bass when the bass control is dimed and too much treble when it is dimed. Both of them around 5 [on a scale of 10] and she purrs like a kitten.

I would include removing C2 as part of the "Simple Tone Mod's." It's really easy to get at it and you don't have to pull the board. Not exactly sure how it will work in in isolation, as my amp has all the other mods, but if somebody is giving this a go, it would be nice to hear back on how it works.


Sound Clippage

And no thread like this would be complete without the obligatory
clip. The lead is done with a Ric 650 through the V8 out the power-amp DI straight into the desk.

It's a killer little amp and well worth looking at. There are others coming into this market and I expect things will heat up in the near future. From what I've seen so far, the V8 with the few mods I mentioned above, is the best in the field so far.


Forum Questions & Answers

Quote:
Originally Posted by datru View Post
I have a V8 with a 12AT7 installed and an L-pad. No other mods.

Are you saying that I should just go in and clip off C12 and C9, no jumping, no soldering, etc? Exactly what will the change be?

Just curious, why does the factory put them in if it's better without them?

Great thread.
If you want to be "safe" use a soldering iron, slip something under the capacitor in question [I find a letter opener works well], heat one side and pop one leg up from the circuit board. Do that to both and see how you like it. If it's not to your taste, you can quickly solder them back in place.

If you feel "randy" just go in with snippers and snip them out of there.

Removing C9 will take some of the harshness out of the amp - particularly with gain.

Removing C12 should [I say "should" because I've done this after numerous other mods, but I'm fairly confident it will] remove most of the midrange that makes the amp sound "boxy" and "honky," for lack of a better term.

I'm not sure what the Crate engineers are smokin', but I don't want any. They seem to get 90% there on a great design then it seems they head off for munchies and leave the janitorial staff to finish the job.

Seriously - I think C12 was put in there as somebodies "bright idea" to add mid-range as well as bass and treble to a single knob tone stack. Probably worked on paper but it ended up introducing a whole bunch of unwanted midrange that you can only dial out by making the signal muddy.

Good luck!


Is it necessary to drain the caps prior to cutting out C9 and C12?


My legal department tells me I can't answer that question. I don't want to be held responsible for anybody that touches the wrong thing and gets electrocuted.

Draining the caps is relatively easy on the V8. Wear rubber soled shoes. I use a multimeter to test the voltage from pin 1 on v1 [the preamp tube]. IME the V8 maintains a charge of around 60 volts. I run a wire from pin 1 on v1 to ground [chassis] for around a minute then test again just to make sure. Might have to do it a couple of times to make sure everything is completely drained.

That said, and I'm not recommending this to anybody, I only do the above when removing the circuit board from the chassis. Being very careful, I can do simple mods to the component side of the board without draining the caps - but that's me.


Clipped them both out and can hear a difference.

Thanks!


Speaker Choices & Changes

The V8 ships with a 10” Celestion speaker that is actually quite nice when you’re driving it properly. It's rated at 15 watts that means the 5-watt amp really has to work to get it close to running efficiently and starts finding its voice.

I have had a few questions about speaker replacements, and have considered it along the way. I was leaning toward the Emminence Lil Buddy hemp-cone 10". The specs appear to be what the amp needs - a less efficient speaker with a warmer tone and smoother breakup - but the large magnet appears to make installation a problem. I considered front-loading the speaker [stock it is back-loaded] but that would require a fair bit of work with a Dremel tool with no guarantees I'll like the result. I emailed Ted Weber and he suggested the following, which I'm considering:

"For that, I would use a 20 watt AlNiCo Silver Ten for a warmer, ballsier tone with later breakup and a creamy distortion while retaining detail and articulation."

I had tested the V8 through a vintage Alnico speaker and was quite impressed with the tone. While the stock Celestion is 4 ohm, I found the V8 sounds best through the 8-ohm speakers I tried. As well, the schematic for the VC508 [which is identical electronics-wise] indicates an 8-ohm speaker. Why they put a 4-ohm in the V8 is a mystery [it adds to some of the tonal oddness IMO]. I ordered the Weber 20 watt, 8-ohm Alnico Silver 10.

When I went to install the speaker I found, to my dismay, it didn’t fit. The magnet was too big which made the speaker too tall.


I contacted Ted Weber and he was as disappointed as I. While his Ceramic Silver 10 looks like it would be a better fit, he said he recommended the Alnico because it would be the best sounding. He was very courteous and helpful, offering a refund or exchange.

But returns are a hassle and I already had my mind set on the tone of an Alnico so I moved to plan B. When looked into the Eminence Lil Buddy [also too big] I considered modding the cabinet so the speaker would load from the front instead of the back to make it fit. This approach has other advantages as a front loaded speaker provides more natural and better sound projection.

The V8’s plywood baffle is 1/2” thick – that plus the thickness of the speakers mounting-rim [on the other side of the baffle] would provide enough space to allow the magnet to clear the electronics compartment. The problem - the way the front of the cabinet is designed the bottom of the V extends where the speaker would sit. Undaunted, I pulled out my drill and grinding wheel and went about routing out the overhang. With that done I found the mounting rim of the speaker to be just a bit bigger than the hole. I reamed around the edge enough to allow the speaker to sit flat against the baffle.


Even though the speaker would cover the unsightly mess, I knew someday somebody would remove the speaker and say “what asshole created this mess,” so I sanded it with 100-grit sandpaper and put a coat of flat black paint on it. While not perfect, you have to look real close to see that’s not how it came from the factory.


The speaker fits nicely now:


As do the electronics


I have yet to remove some wood from the frame of the grill cover so it mounts properly, but that’s a cosmetic detail.

What is important is how it sounds - absolutely fantastic! The speaker really brings the amp to life and it sounds as good [well 9.5 out of 10] as the 15” I was using for testing. Honkiness gone! My objective of having a great sounding rig with just the amp and guitar is now a reality. I have a solid basic tone and my effects are the icing – just the way it should be.

My modded V8 now works like a class A amp should. It’s got tons of luscious tube grind on tap that cleans up with the volume pot on the guitar. The cleans are not Fender-pristine but are very clear, articulate and more than serviceable. This amps strength is in its ability to pump out thundering tube distortion at volume levels that are respectable, but won’t make your ears bleed. And it’s all in a package that’s uber easy to move around.

Future mods – There is one last mod I’m considering but its more of a nice-to-have than a need-to-have. Stock the tone pot is designed so when you turn it to the left you cut treble [add bass] and when you turn to the right you adjust the mids [and add bass]. I’m considering putting in a concentric pot [stacked] so there are 2 separate controls – one for bass/treble and the other for midrange.

In the meantime, I’m off to see what I can do to get this V33H running respectably.
A couple of months ago I picked up a small 60's era TAKT tube amp off CL. It has a 6" speaker that's labeled 3 watt @ 8 ohm. I plugged the V8 into it and was extremely impressed with the rounder, fuller tone and realized how harsh and brittle the stock Celestion is by comparison. I sent Ted a picture and asked if he could identify the type of speaker/magnet. He responded very quickly saying it was an Alnico. The stock Celestion is ceramic. I also have a vintage JBL K140 15" bass driver that has a wonderful, full tone to it. I've started becoming a bit of an Alnico fanboy in the process.

As I said earlier, I was considering the Eminence Lil Buddy hemp cone speaker, as that is the one Carr uses in his little boutique amps, but they require a conversion to front loading as well. I looked over Weber's site and became a bit overwhelmed by the choices, which is why I asked Ted directly for a recommendation. He said he made his recommendation based on matching the speaker to the amp.

From a tone standpoint, the Weber Silver Bell Alnico is a superb choice. It actually sounds better than the 15" full range Yamaha driver [in a closed back bass cabinet] I was preferring. The Yamaha driver is "okay" for bass, but excellent for every guitar amp I've used with it.

I think it says quite a bit for a 20 watt 10" speaker in an open back combo cab to sound as good, if not better, than a 150 watt 15" speaker in a closed cabinet.

I will admit, mounting it was a pain-in-the-ass, but well worth it. A front loaded speaker is actually the preferred way to go as the sound isn't obstructed by the baffle in any way and has far better projection.

Now that Ted has some experience to draw on [he didn't do a V8 before] you might want to ask him if he has any other suggestions that will fit without modding but sound as good. He does offer a ceramic Silver Bell that looks like it should drop in directly, but I'm not sure the tone will be as nice.

Note: Ted Weber, founder and engineer of Weber Speakers, died on August 14 at age 58.


Tonestack Mods

Here's the details on the tone stack mod. I've attached a copy of the Trainwreck Express schematic I used as a reference. I played around with a Fender/Vox/Marshall but the Trainwreck worked out the best and I figure if I'm going to plagiarize something I might as well take from the best. I used the following Allparts parts:
The shafts on the pot were too big for the knob so I had to get them drilled out.

In addition you'll need:
    1 x 500pF cap
    2 x .022uF caps [I used mica]
    1 x 100K 1/2 watt resistor [I used a 1 watt since that's what I had]
    1 x 20K linear pot for midrange control
    1 x knob for midrange pot
    some wire and a solder sucker for removing P2
    shrink tubing to keep things from inadvertently shorting
I assembled the caps/resistor/pots beforehand and tested them between my guitar and the amp to make sure they were doing what they were supposed to and to fiddle with component values. Once it was happening, I pulled the pcb from the amp and removed the remaining components as DC indicated:
    Remove: C9, 10, 11, 12, R12, R13 and P2
The pot shaft is bigger than the hole in the face of the V8, so it had to be drilled out as well as a hole in the bottom of the chassis for the midrange pot.

After that, installation was relatively easy. I soldered the IN end of the 500pF cap to the empty C11 hole that connects to R11 and the OUT wire to the empty R13 hole that connects to R6 [check the reverse side of the board and follow the traces]. DC was correct again in stating:
    IN is at R11 out
    OUT is at R6 in
I ran 3 wires to the midrange pot. You might be able to get away with 2 by using a different ground, but I decided to play it safe and run a ground wire back to the ground used by the center terminal on P2.

The amp sounds great. Each mod I've done has incrementally improved the tone and this is like the icing on the cake. It's nice to have midrange control and a solid bass response without loosing highs.

Sorry for the fuzzy pictures but my camera sux. The wiring diagram is "as you see it." With all the components attached, the new pot is a bit of a blob, so be careful nothing shorts out - shrink tubing on leads and solder joints helps considerably.

V8-Trainwreck-wiring.jpg

Trainwreck-schematic.jpg

1.jpg

2.jpg

3.jpg

4.jpg

5.jpg

6.jpg

7.jpg


I ended up using the 3-knob tone stack from Ken Fischer's Trainwreck Express Version A0. I put a dual concentric 250K stacked pot where the old tone pot was and drilled a hole in the bottom of the chassis for the mid control. I still have to button it up and play with it a bit, but on firing her up and doing a few tests, she's the charm. I ended up with a 20K mid-pot [I think it's audio taper] and may try swapping a 10K linear taper just to see if there's much difference. I'll post up a wiring diagram once I get things cleaned up around here.

Next, I'm going to add a spring reverb to it.


Quote:
Originally Posted by Verne Andru View Post
Next, I'm going to add a spring reverb to it.
Looking forward to that!


Quote:
Originally Posted by datru View Post
Looking forward to that!
Adding a spring reverb is relatively "easy." I'm using Craig Anderton's Stage Center Reverb circuit, getting a 1/2 size tank from Accutronics [I have to upgrade my V33 anyway and the tank will fit in the bottom of the V8 cab so I'm ordering 2]. Since I'm running the FX loop through my backpack box anyway, all I have to do is mount the SCR in the backpack and tap it into the FX return. I'll probably use a wallwart for power, but could tap into the V8's AC power - still undecided on that.

And this is why the V8 is so cool - it has an FX loop! Couldn't do it without it [as easily, that is].


Post-Mods Sound Clips

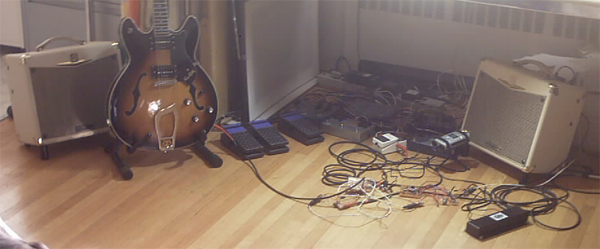
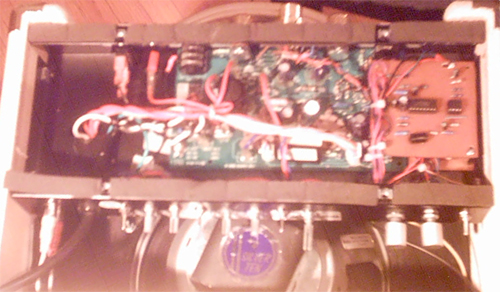
I've made a few more changes and decided it was time to record some clips with various guitars/pickups. I really suck at clips, so apologies in advance.

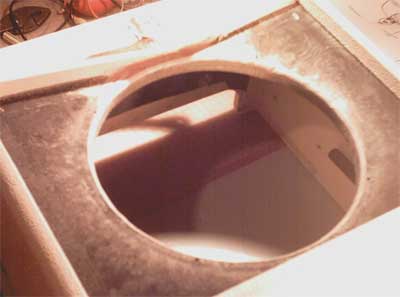
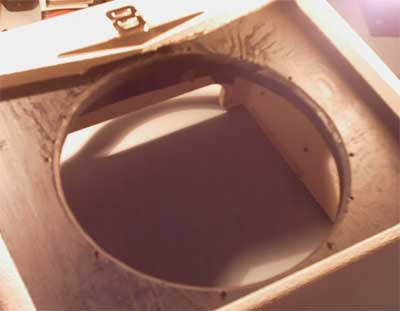
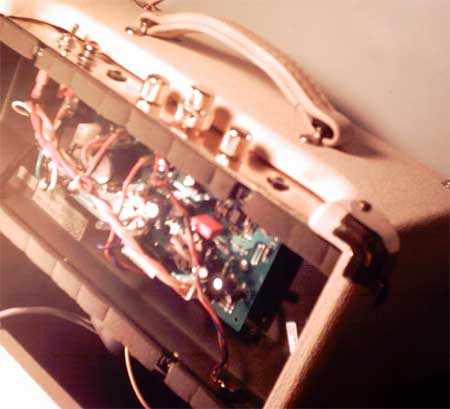
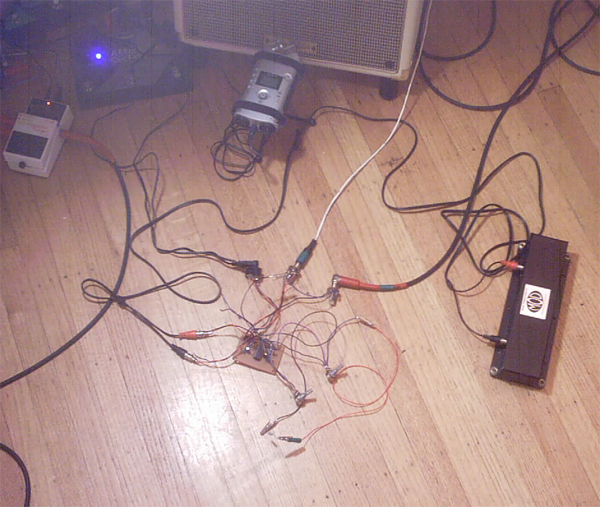
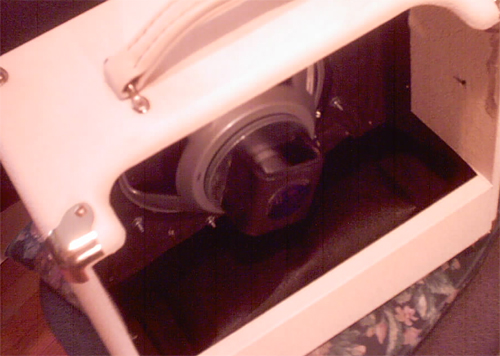
I recorded from the 10" speaker [now a Weber Alnico Silver Bell] only using 2 mic's - a Blue Kickball about 2' and a SM57 about 10' back. There's some clipping on the Kickball that's likely mic placement. I'll try and fix that for next time.

Aside from a bit of flanger at the end, the only effect I used was some delay. Recorded into Cubase with a bit of compression, limiting and EQ to taste - the settings remain the same throughout all clips.

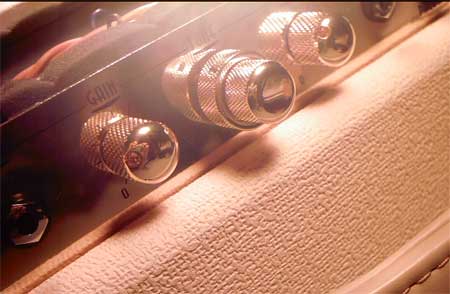
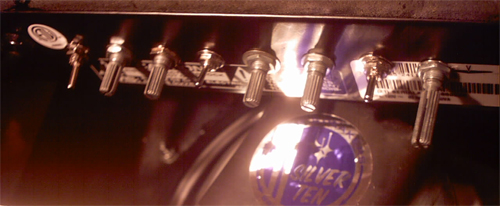
The amp starts out set with Gain @ 9 o'clock and volume almost wide open. At around 2:45 I open the gain up to a little past 12 o'clock and leave it there for the duration.

Stock, the V8 sucked at doing a clean tone no matter how hard I tried, so I'm starting this with my jazz-box - my Danedetto. It's a hollow body with a floating Kent Armstrong humbucker at the neck and strung with flatwounds.

00:49 I switch to my Hagstrom Viking [335-ish semi-hollow] with SD P-Rails. It starts with the Rail setting, neck solo, then both pups in rail, both pups in P-90, both in humbucker then the bucker bridge solo. All that changes are the pickup selections.

02:07 is my Sheena. Starts with both pups, then bridge solo, then bridge solo with gain cranked to noon.

03:06 I bust out my Les Paul with SD SH-2N Jazz in the neck and TB-4 JB in the bridge. It goes neck, both bridge than I kick on flange for the end.
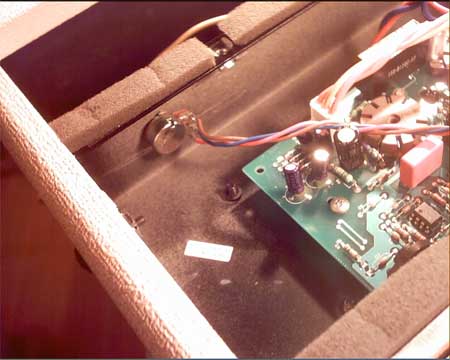
It's been a few years now since I've heard one of these stock, but from memory they are really fizzy and farty with no clean headroom to speak of. Boxy and thin with an annoying mid-range honkiness and no balls to save its life. Basically sounded like a cheap little Crate tube amp - which is exactly what it is.

I'd like to squeeze a bit more bass response out of it, but am generally much happier with it now. It does a pretty good job of letting the character of the pickups come through. And there's plenty more gain on tap than in this clip, as the gain knob was only around 1/2 way. I'm in an apartment and can't really crank it without fear of an eviction notice, but I have no doubt it'll get really close to hi-gain metal territory.

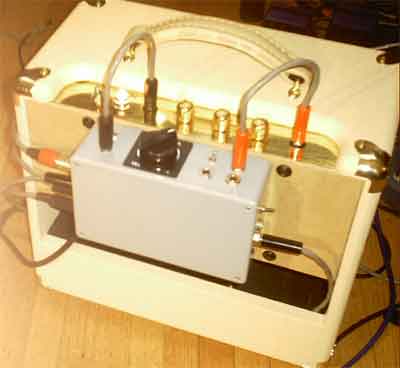
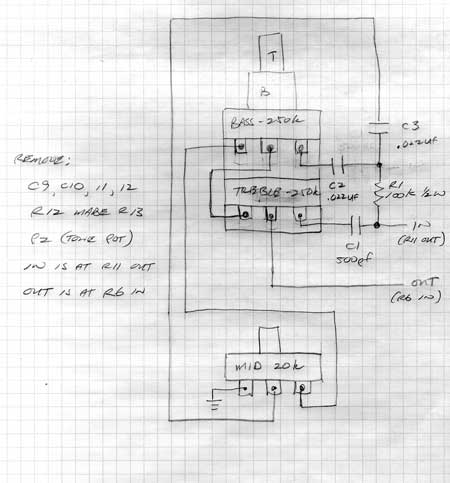
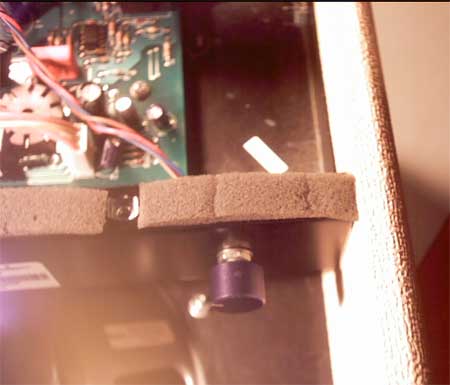
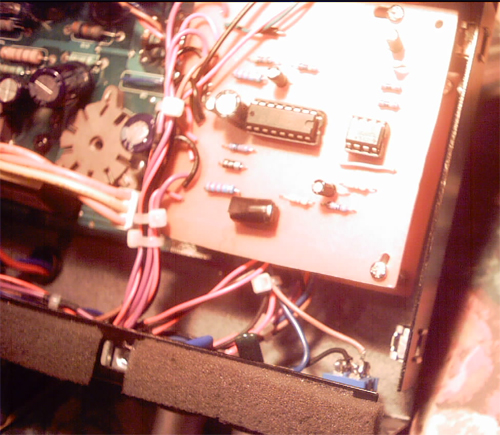
I did another mod that I didn't record, and that is a boost switch. It disables the tone-stack allowing the full signal through to the power section. It adds from 10 to 20 db of boost [guessing here] but pushes the tone toward treble side - which is actually a good thing for lead breaks. I'm going to see about making the boost foot-switchable once I can tame the treble a bit more.


Consolidated V8 Mods Schematic I think I got everything. I'll go over it once I get a chance to print a hardcopy.

There are a few more mods than what I've posted in this thread. Most of it is removing components that suck tone. Adding the new tone stack is the biggest job, but is well worth the effort for the added tone and flexibility.

Let me know of any errors/omissions you spot.

Good luck and happy modding!
Quote:
Originally Posted by Verne Andru View Post
:

V8-rig/Modded-V8-schematic.pdf

I think I got everything. I'll go over it once I get a chance to print a hardcopy.

There are a few more mods than what I've posted in this thread. Most of it is removing components that suck tone. Adding the new tone stack is the biggest job, but is well worth the effort for the added tone and flexibility.

Let me know of any errors/omissions you spot.

Good luck and happy modding!
This is awesome, Verne! Thanks for all the work done to document the mods and answer questions!


Adding Spring Reverb & Tremolo

Okay - spring reverb time. The last 2 pieces - the tank and bag - finally showed up today. I was originally going to go with Accutronics, but as I noted earlier, between the time I first started this and now, Accutronics have moved production to China and raised their prices. A tank that was going to cost me $28 is now $35+. From what I'm hearing the quality has suffered as well.

After some googling I ran across the Mod line of tanks. These, I believe, are made by Jensen [the speaker people] and the reviews I read claim they're like a really good, vintage Accutronics. Plus the one I need [8DB2C1D] sells for $16.50 so I was able to get the tank and bag for $26.45, which is around what just the Accutronics tank used to cost. I found them over at Amplified Parts but they don't appear to be available anymore.

Just so happens the tank is the same one [specs anyway] used in Marshall amps. Amplified Parts were very good to deal with, but for some reason they couldn't charge my CC, so I had to send them a MO via mail, which is the cause of the delay.

It is a "short tank," measuring 9 1/4", with 3 springs. If you're not familiar with reverb tanks, the bag is used to enclose the tank at the bottom of the amp cabinet. Provides sound isolation and keeps the dirt and beer away from the electronics and springs.

For the circuit I'm using Craig Anderton's Stage Center Reverb [http://www.generalguitargadgets.com/projects/25-reverb/43-stage-center-reverb].

I made my own PCB, but you can order a pre-made [and drilled] one for something like $15, IIRC.

One of the things I've been noodling is how to mount the electronics and where to get the power from. I originally thought about putting it in a small box that I could attach to the inside of the cab, but I think this should be done as eloquently as possible and will be mounting it inside with the other amp electronics.

On the question of power, the circuit uses a bi-polar power supply - that's a positive and negative DC voltage. The easy way to do that is to use 2 9V wall warts, but that's a bit clumsy and expensive. Since there is 14V supplying the opamp section of the amps board, I designed a circuit that converts that to the 15V bi-polar supply we need.

The good news is, if all works well I also made the PCB and bought the components to build Anderton's Tremolo. It also runs on bi-polar power, so the plan is to add a Tremolo to the V8 as well.

Here are the bits I'm needing to pull this project together:

V8-Reverb-bits-1

V8-Reverb-bits-2

With everything in-house I guess I have no more excuses so the next step is to clear off my bench and start soldering.


Update: I've achieved reverb!

Built up the Stage Center Reverb circuit yesterday and, aside from one stupid mistake, it worked right away. Unfortunately there were noise issues - Anderton designed it so the clean signal goes through a stage of the opamp before it is mixed with the audio coming from the reverb tank. Opamps tend to introduce hiss and other arbitrary noises, and it was no different here.

Once I figured out where the noise was coming from, I rewired the Mix pot [which is marked wrong on the generalguitargadgets wiring diagram - the Mix should be the marked Dwell and vice-versa] so the clean signal goes to the output jack and the Mix pot goes between the reverb output and the output jack. There were some expected issues with feedback, which is why engineers tend to put opamps in the circuit as they stop the reverse flow of signal which is what causes the feedback. I put a few resistors inline and problem solved.

There is a bit of a trade-off in that one of the resistors is on the clean audio signal, which reduces the audio level ever-so slightly, but I'd rather have a clean signal that I can juice somewhere else than a loud dirty signal. I'll be putting in a true-bypass switch so this will only be an issue when the reverb is engaged.

Pics and clips to come later.

Next up is putting the Tremolo circuit together and test that one out.


Update 2: We now have tremolo. Still have some debugging to do, but it works.


Update 3: I have the Reverb and Tremolo circuits pretty much cleaned up. I still need to do a true-bypass for the Reverb, but I need to get a 3PDT switch first. I need to build and test the power supply board. I used 2 wall-wart power-supplies for power so I could test the circuits outside the amp first. Gives me the chance to debug and figure out if I want to make them permanent.

Here's with just the reverb circuit:


The Tremolo is based on an opto-coupler that's pretty hard to find. The nice thing about an opto-coupler is it's analog so the tremolo action is more organic. Not being able to get the CLM 6000 [reads 600 on the doc] I "rolled my own" - quite literally. Here's a page that describes how to make one with an LED, a light dependent resistor and some shrink tubing or electrical tape:


Here are instructions on
how to make an opto-coupler.

I used a red LED. My shrink tubing is too small, so I gave it a try with carefully cut and placed electrical tape. It took a few tries, but I finally got it solid. It works like a charm. The resistor must be face to face with the end of the LED and mine was moving around as I moved the legs to accommodate the holes.

Here's the tremolo and reverb circuits:


I have them temporarily wired to 1/4" phone jacks and used patch cables to put them in the V8's effects loop.


I recorded some clips with the Zoom H4 you see in front of the V8. I use it as a grab-and-go-stereo-mic with it's own recorder so I didn't pay much attention to pointing it just right. I used the pictured Hagstrom Viking with P-Rails and a Strat with Mojo Tone Custom Wound 50's in the neck and mid and a SD Lil 59'er in the bridge.

There are a few clean clips at the start, then the reverb maxed followed by the reverb adjusted to taste. While this won't keep anybody at Fender awake at night, it's not bad either. On clean it captures the sound of the guitar. The reverb gets fairly "cavernous" and cleans up well after that. Adds a nice sense of dimension to the tone.

The Tremolo turned into a bit of a surprise. I wasn't sure what to expect. Since I was building up the Reverb circuit anyway, they use the same power-type, so it didn't really wasn't "costing" anything, I decided to see what it would be like. It's pretty sweet. Puts out quite a range of tones that are very usable. It has Level, Depth and Frequency pots and a Waveform switch, so there are tons of variations. I tried to capture as much as I could in the clip.

What you're hearing on that clip is now all part of the amp. It's got a nice, sparkly clean tone that growls when pushed into distortion. It responds really well to pick attack. The reverb gets far more "cavernous" than I'll ever use. I like a bit of reverb after delay to fatten things up. The Tremolo really takes it over the top with some great tones and effects. Well worth the build.


Reverb/Tremolo install is [finally] done. This certainly falls into the category of "if I knew then what I knew now" because it was a ton more work than I thought about going in.

Major apologies on my mega-crap camera. I tried to get progress shots, but some are pretty fuzzy. New camera is on the "list."

First thing I did was sort out the power situation. The V8 provides a bi-polar supply to run it's opamp, and that seemed like a pretty good place to start. I had built up a power regulator circuit but discovered, after it didn't work, that the V8 only puts out around +/- 7 volts. Undeterred, I did away with my regulator and took the power directly off the V8 board into the Reverb and Tremolo PCB's. To get at it I soldered to the underside of the board, tapping into the power at C21 & C22.


I went back and forth about using the V8 power or wiring up a couple pedal power supplies but ended up staying with the V8 power. As it turns out, those capacitors are exactly where I needed them to be as that side of the chassis is the only area large enough to mount my PCB's.

Next was getting at the FX return signal. I needed to interrupt the signal after it Returns but before it hits the 12AT7. The only way to do that was to desolder the jack, lift one side and bend the Return [Ring] leg. I put some electrical tape between the jack and the PCB to make sure it wouldn't make a connection. I used shielded cable, attaching to the Return leg, the underside of the PCB and the Ground [Sleeve].


The Reverb PCB is just the right size to fit in the open area on the input jack side of the chassis. I drilled 4 holes and used 10mm stand-offs to hold it in place.


The Tremolo PCB is significantly larger than the Reverb, so I used some stacked stand-offs to hold it over top of the Reverb PCB like a piggyback.


Wiring was extremely time-consuming. When I initially wired the boards I used random wire lengths as I was focused on seeing if they would work well enough to even consider doing the install. After drilling the holes for the pots and switches, I put the boards in position and either rewired or extended the length of the existing wires so everything would fit. I also eliminated redundant ground wires that were used to attach things like the input and output jacks. I tried to keep the wiring as organized and neat as possible and keep things clear of things like power caps that can introduce noise. Just as the power source was in the perfect spot for the PCB's, the FX loop wiring was in the perfect location to wire to the switches. The reverb send/receive RCA jacks are on the far side past the power cable.


With the circuits installed, powered and working, the next job was getting the reverb tank installed in the cabinet. I opted to use Velcro to hold the bag to the bottom of the cabinet. I also made a custom RCA cable to attach between the amp chassis and the tank.


And here we have the amp back together with it's new Reverb and Tremolo installed and working:


From left to right controls are:
  • Reverb on/off switch
  • Reverb dwell amount
  • Reverb mix amount with clean signal
  • Tremolo on/off switch
  • Tremolo speed
  • Tremolo depth
  • Tremolo shape switch
  • Tremolo level
And since that last pic I added a 1/4" jack for an expression pedal to control the Tremolo speed.

Still need to get some knobs for the pots. [Update: Dave Koltai was kind enough to donate a box of knobs - thanks Dave!]

This project isn't for the faint of heart. It would have been outrageously expensive to pay a tech to do this, so I'm glad I could do it myself. And it's really rewarding.

But time for tinkering is over and I must get back to playing - which is, after all, what this is all about.

Totally loving the amp - ideal practive and recording rig.


Adding Second Speaker

And while I'm posting, I should mention that gnolivos was kind enough to sell me his empty V8 cabinet. I've since picked up an Eminence Lil Buddy hemp cone speaker and turned it into a matching extension cabinet. As noted earlier, the
Backback provides the requisite extension speaker jack.

So my rig is now a 2x10 - the Lil Buddy and a Weber Alinico Silver Bell. The speakers compliment each other really well. The Lil Buddy is a bit darker and each has it's own sweet spot. I have them separated and it's neat to listen to an almost "stereo" spread as the sound seems to wash back and forth as the individual speakers enhance their particular frequency ranges.

The magnet on the back of the Lil Buddy is huge. I've not yet checked to see if it would fit along with the electronics, but my hunch is that if it does, it's going to be really tight. Great sounding speaker though!


Tilt-Back Speaker Cabinet Mod

Here's a neat little mod/trick I just came up with. I have my 2 V8 cabinets on the floor and was pondering how I could do a non-destructive tilt-back mechanism so the speakers would aim the sound up a bit, away from my ankles. While cleaning out some junk I found a bunch of these old plastic 35mm film containers I had squirreled away that look like this:


I tried a couple under the front feet [take the top off and put the foot inside] and they were pretty near the perfect fit, albeit a bit floppy. Then I came across the idea of putting the lid between the foot and the cabinet so the canister part could pop on/off as I needed. After looking at a bunch I found some black lids that the feet fit in perfectly [on the inside] - punched some holes for the screw and - voila - instant kick-back.

The come in various colours and from slightly different molds. If you have a shop that still does 35mm film processing chances are they'll have boxes of them and be more than willing for you to take a few off their hands [at least one close to me was like that].

Hope somebody else can put this idea to good use.


Verne Andru Mods

So Verne, now that you've documented everything on a schematic I think the mods should get their own name.

When I tell people of these mods I'm calling them the "Verne Andru mods" - unless you prefer something else.


Quote:
Originally Posted by Preacher View Post
When I tell people of these mods I'm calling them the "Verne Andru mods" - unless you prefer something else.
Works for me!


Guitar Player Accolades

Who would have guessed?

Me [and my modded V8] are in the March 2010 issue of Guitar Player magazine!

It's great little write-up on a tune I call DV8. If you recall from way back to the beginning of this thread, I recorded it as a way to test how the amp records. It's in the key of D, hence the D and the V8 is an obvious reference to the amp. The "deviate" pun was a nice happenstance.

It came as a complete surprise but always nice to get some little recognition. Best compliment ever and makes all the work on the mods sound so much sweeter!